Foodie - Product pages
Your product page includes a configurable set of options to shape and display the content that is shared across all products in your store.
Product Page Section: Settings
To view or edit general settings for the product page section click on "Product page".
-
Background color
Set the background color of the top half of the product page.

Product Media
The Foodie themes product pages support images, video, and 3D Media AR content. To view and edit Media settings click the Product page section.
-
Gallery style
Select a slideshow with thumbs or grid view of product images -
Thumbnail position
Allows you to select the position of the thumbnail images, choose from Left, Right, and Bottom of the main product image. On mobile, the images will resize and thumbnails will be hidden where customers are able to swipe through the main image carousel.

- Large product media gallery
-
Enable grid gallery 2 per row
If using the grid gallery, sets them 2 in a row -
Enable click to enlarge
Enables a modal window that will show an enlarged version of the image when clicked. -
Enable video looping
When Videos are included within your product media, toggle looping to allow the video to play infinitely.
Product Page Section: Blocks
- Title
-
Subtitle
Customizable text, best filled with metafields to stay dynamic - Price
- Variants
- Quantity
-
Buttons
The product form allows you to show or hide the price in the button. It also holds gift card recipient information. -
Social share
Allows customers to share links to your content on their preferred social network. -
Popup link
Show text, image, or content from a page. - Text
-
Description
Show your product description. Can be tucked into an accordion. -
Payment Icons
Outputs the payment types you have enabled. -
Accordion content
Tuck text into an accordion. - Popup
-
Product customization
Allows you to add a customization block for customers to add single line text, multiple line text, or an image. Best used on separate templates for customizable products. Does not adjust pricing. -
Complementary Products
Set specific products you'd like to show on each product, using Shopify's Search & Discovery app. -
Text with icon
Add text with a selectable icon.
Advanced product blocks:
Product subtitle


The optional product subtitle displays beneath the product title on product pages and in the collection page grid.
The subtitle uses a product metafield for this.
To add a subtitle:
- In your Shopify admin open: Settings > Metafields > Products
click on Add definition. - For the Name start typing "Subtitle" and a suggestion for "Product subtitle" will appear, select this and save your changes.
- In the main Shopify admin open to the product you want to add a Subtitle to, scroll to the bottom of the page and you will see a new section for "Metafields" click inside "Product subtitle" and add your text.
Save the changes and repeat this step for other products where you would like to show a subtitle.
Product Details
The product detail section will appear below the top Product page section. You can add or remove blocks to select which details are shown on this product template. If a particular product using this product template doesn't have one of these details and the block is active the detail will be hidden (not blank).
- Description
- Inventory
- Weight
- Type
- Sku
- Vendor
- Collection (if visiting the product page from a collection page this will show)
- Detail image
- Single-line text
- Multi-line text
- Tag groups

Detail image

To show a unique optional product image next to the Product Info/Details box follow these steps:
- Add the "Detail image" block to the Product details section.
- In the product admin under media upload the image you would like to use.
- Once it is uploaded click on it to view the image editor. Click the blue link that says "Edit alt text".
- Add `#detail-photo` to the end of your alt text and save.

- This feature only supports one image with the `#detail-photo` alt. Once saved your image will automatically show.
Tag Groups
If you would like to show even more unique details about your products you can use product tag groups which will show along with the other Product Details. To set up product tag groups follow these steps:


- Add a "Tag Groups" block to the Product details section.
- In your main Shopify Admin open Online store > Navigation
click on Add Menu.
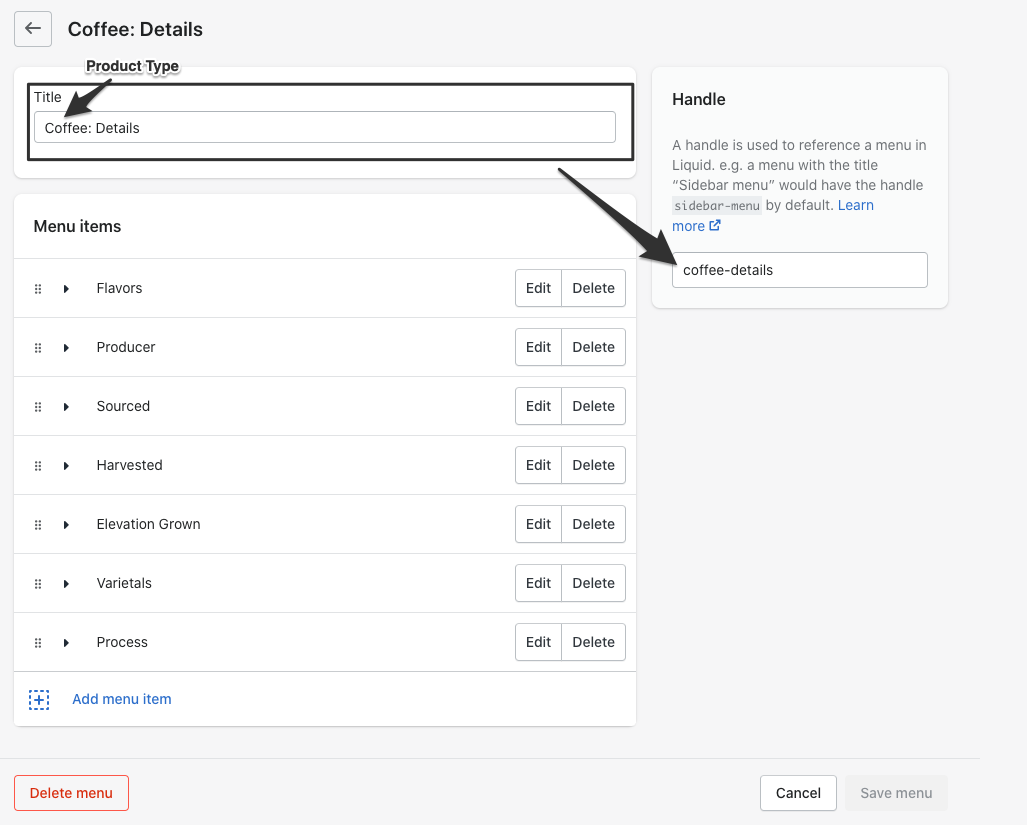
- The menu title should be the product type (the actual product type you have set on the product in the product admin) and the word details. In this example the product type is set to Coffee so the format for the menu title would be `Coffee: Details` formatting the title this way should automatically give the menu a handle of `coffee-details`.

-
Add a menu item and name it as the title for your Tag group,
For example: Flavors.
The link is not important but required so this can be linked to your homepage.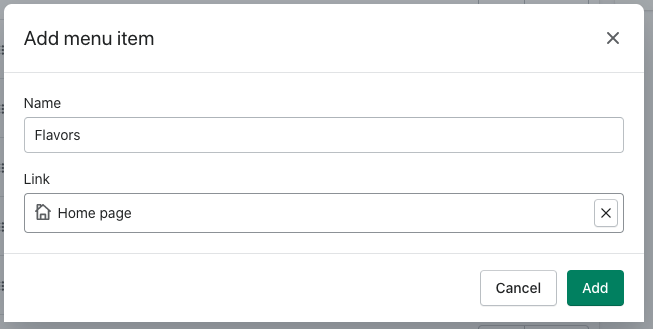
-
Click add menu item again, this time the name should be the exact tag you used when setting up the product. So if you tagged your product with Orange you will name this menu item Orange spelled and capitalized exactly the same. The link is not important but required so just link it to the Homepage.
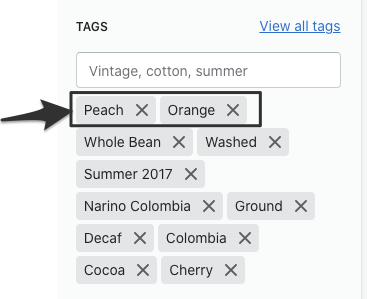
- Now drag your newly added tag menu item (Orange) into the Flavors menu as shown. Repeat steps 4 and 5 for all of the tags that exist for your tag group (Flavors).
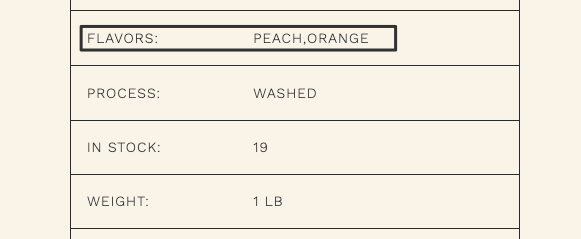
- You can continue to add Tag Groups/Tags into this menu and then repeat from Step 1 for other Product Types. In this example, if one of our products is Product Type Coffee and it has a tag of Orange the Flavors: Orange product detail will show.
Metafield
An alternative method of adding unique product content to the Product details box is to adopt the usage of Shopify Metafields. In this example, we will show you how to add a "Flavors" metafield to your products.
- Go to your Shopify admin > Settings > Metafields > Products > click on Add definition.
- For the Name type "Flavors", for Namespace and key use "my_fields.flavors", Description is optional and will show in the admin for anyone editing your products, click select content type and choose Text > Single Line Text. Save your changes.
- In the Shopify Admin go to the product you want to add Flavors to, scroll to the bottom of the product admin page, click next to Flavors and add the text. Save your changes. Repeat this step for all products you want to add Flavors to.
- In the Online Store Editor, navigate to the product template and add the "Metafield" block inside the "Product details" section. Under label type the text "Flavors". Next to the Content input click the little icon (looks like a stack of circles with a +) to insert a dynamic source, select Flavors. Save your changes. You will now see Flavors as one of the items in your Product details box.
The major difference in using a Metafield block as opposed to a Tag group block is that the Flavors such as "Orange" will not link to all products tagged Orange. Metafields will show basic text they cannot link.
Product in store only

This is a great feature if some of your products are not sold online but only locally in your store locations. Just add the following tag: Instore Only to your product tags and the add to cart button will disable. To edit the text that shows on the disabled button go to your Shopify Admin > Online Store > Themes > next to the theme you want to edit click Actions > Edit Languages > look for the Products tab and scroll down to Instore only.